
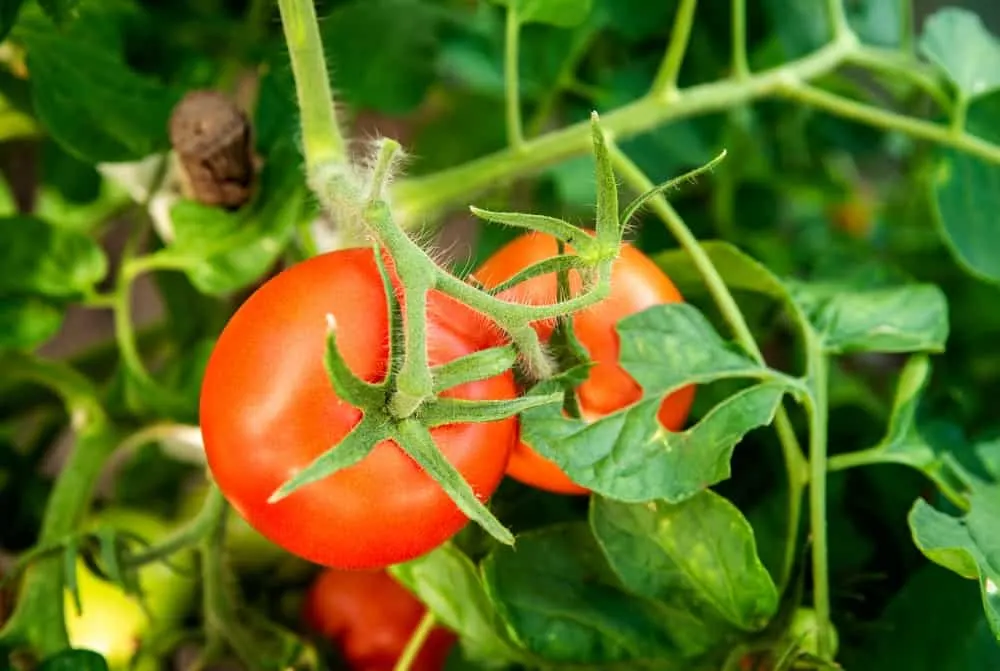
Summer is the season tomato gardeners look forward to for bountiful harvests of juicy fruits. But there are some essential tasks to compete in spring before harvesting season that affect how many fruits you get from your plant, and the quality of those fruits.
Check these chores off your list this spring to maximize your harvest and give you more tomatoes than you know what to do with by the end of summer.

1. Transplant Seedlings
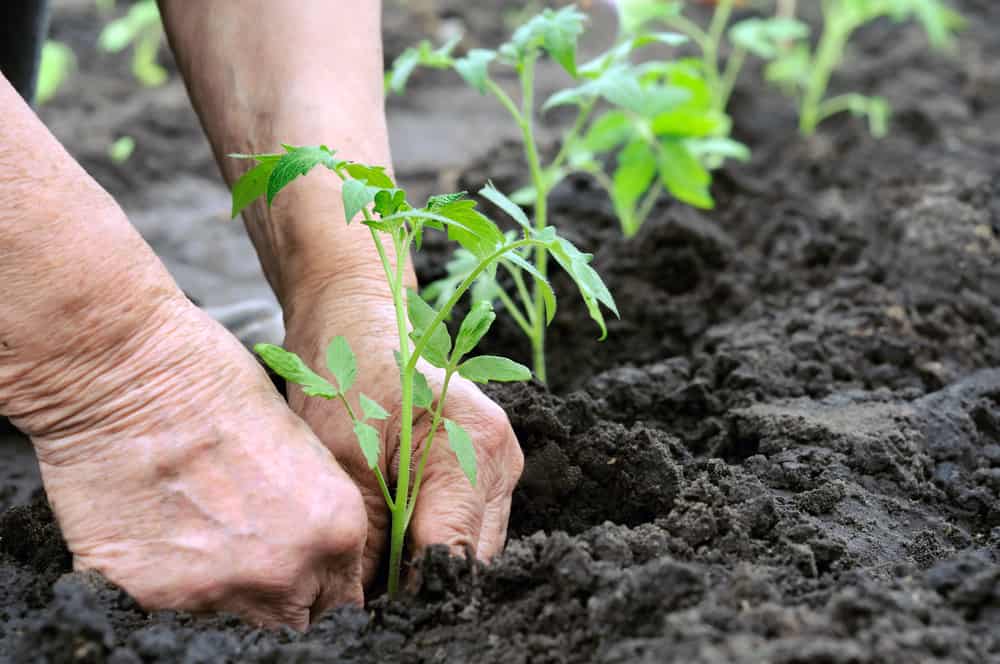
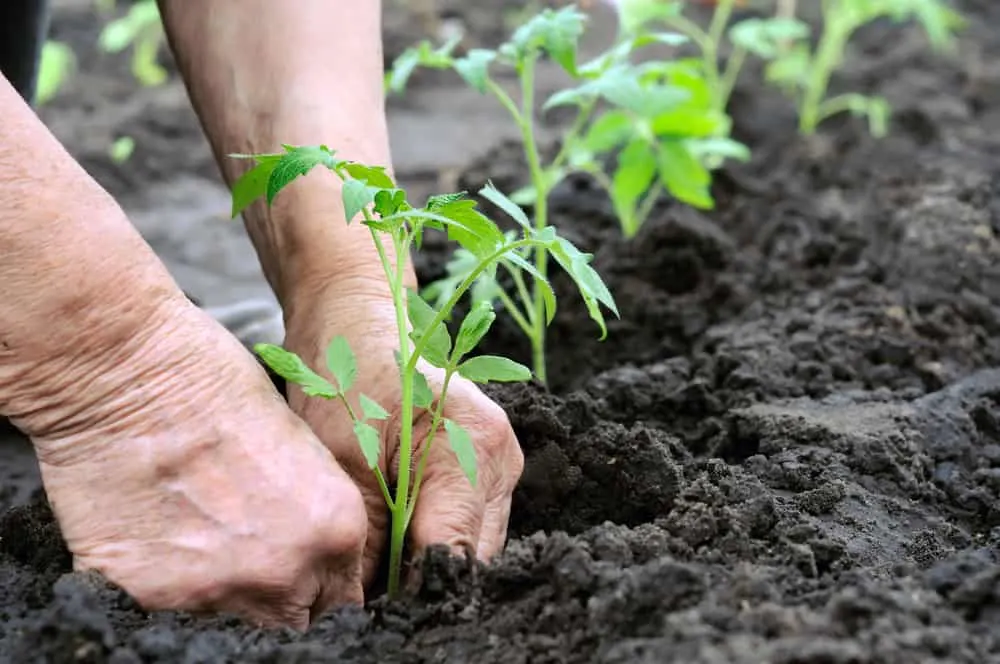
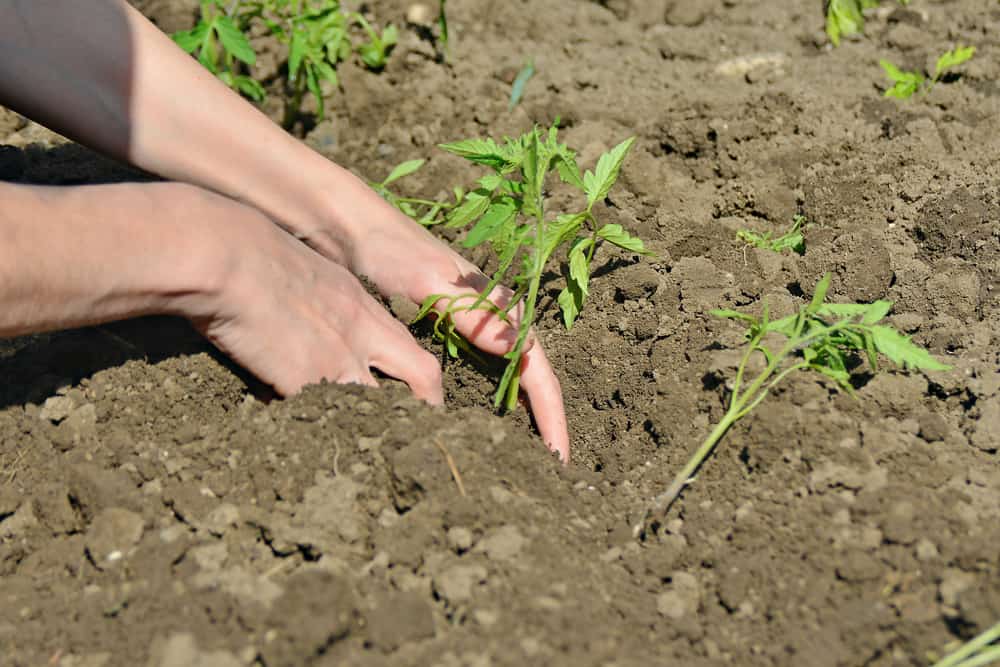
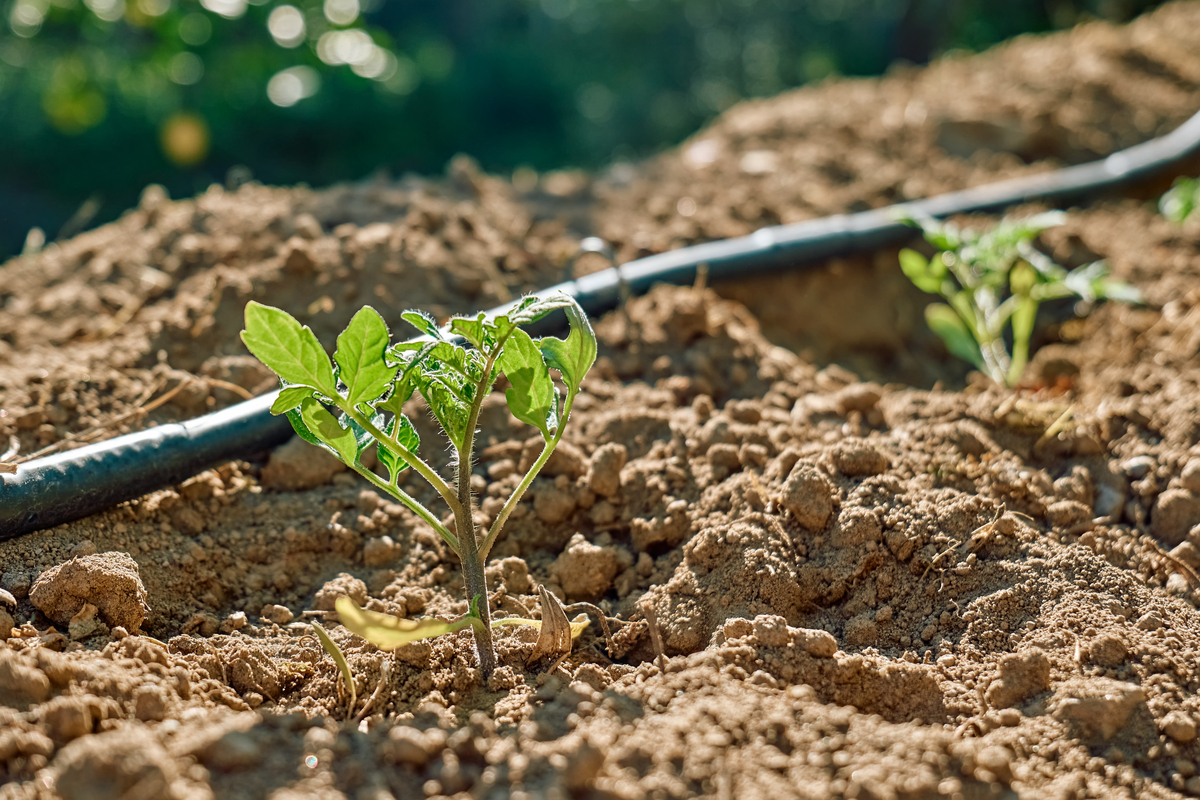
Once all chances of frost have passed in early to mid-spring and the soil has warmed, you’ll need to start your spring chores by transplanting your seedlings. You may have started your own seeds indoors or purchased them from your local nursery. No matter which, the process is the same.
Tomatoes are ready to be planted out when they are around 3 to 4 inches tall. This stage is essential to the long-term growth of the plant as it sets the foundations for the rest of the season, determining how well your plant will grow and how many fruits you will get. Along with amending the soil (which we’ll cover next), how you transplant your seedlings is incredibly important.
The secret to strong root systems and ultimately, a better harvest, happens at the transplanting stage.
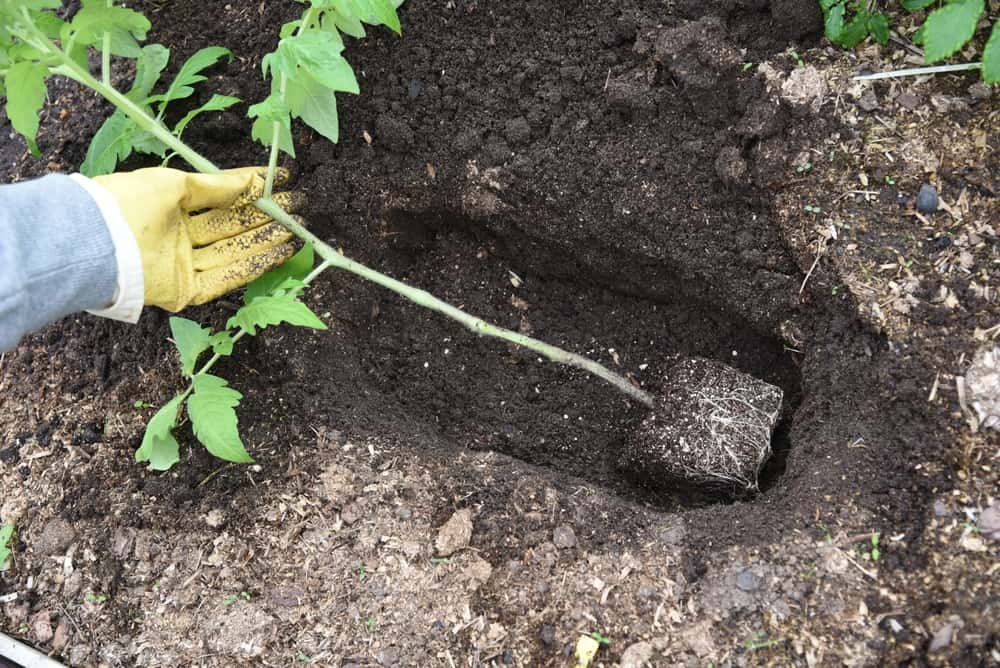

Tomatoes have the fascinating ability to grow roots all along their stems. This means any part in contact with the soil will contribute to a stronger root system. The key is to bury as much up the plant as possible when transplanting – around two-thirds – to strengthen the roots early on and improve overall growth.
There are two ways to get this right. The first is to simply dig a hole two-thirds as deep as your plant, place the plant inside, and fill.
The second is to plant sideways in a long trench two-thirds the size of the plant. The remaining stem will start to grow towards the light once planted, remaining strong and upright.
We cover both methods of transplanting tomato seedlings in our article here.
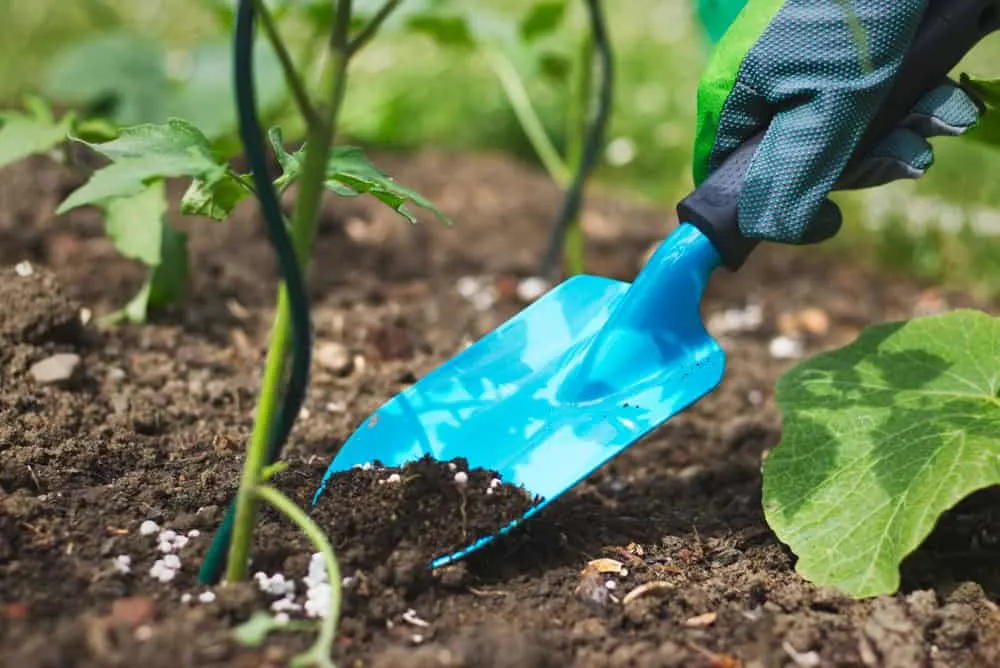
2. Amend The Soil

At transplanting time, you’ll also need to make sure the soil is suitable for your tomatoes and their long-term growth. Incorrect soil will greatly impact your harvest come summertime and is difficult to fix in a short period once you’ve planted all your tomatoes out.
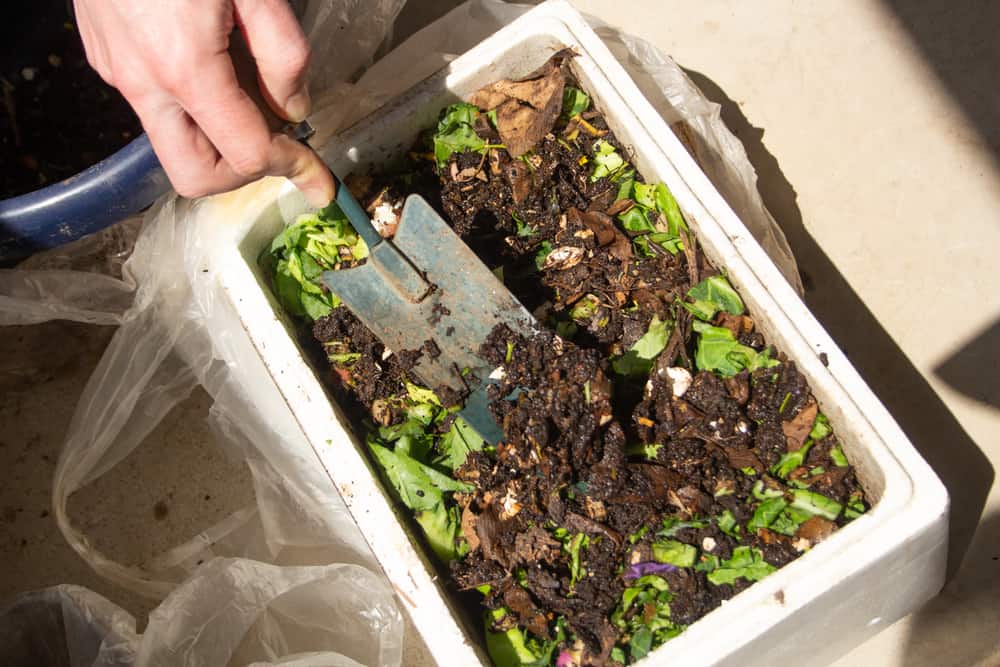
Tomatoes prefer a slightly acidic to neutral soil pH high in organic matter. Start by adding a healthy amount of compost to the soil. Mix it in deeply to reach the roots that will extend further down into the soil.
You can also add bone meal for extra phosphorus if your soil is lacking, or Epsom salts if you need to up the magnesium. But it is best to conduct a soil test before making any of these amendments as they are only required if your soil is nutrient deficient. Overdoing any of these nutrients in the early stages will negatively impact your harvest in summer.
If your soil is closer to clay than loam, you can also add additional drainage materials like river sand or perlite. For improved moisture retention, add peat moss or its sustainable alternative, coconut coir.
Related Reading: 5 Things To Put In Your Tomato Planting Hole (& 5 Things You Shouldn’t)
3. Weeding

After transplanting, your young seedlings will be quite vulnerable to competition, impacting root and stem development and by extension, fruiting later on.
Weed regularly, removing the plants when they are still young and before they have a chance to strengthen their root systems. This will eliminate any competition for nutrients and will prevent overcrowding, lessening the risks of disease.
4. Install Drip Irrigation

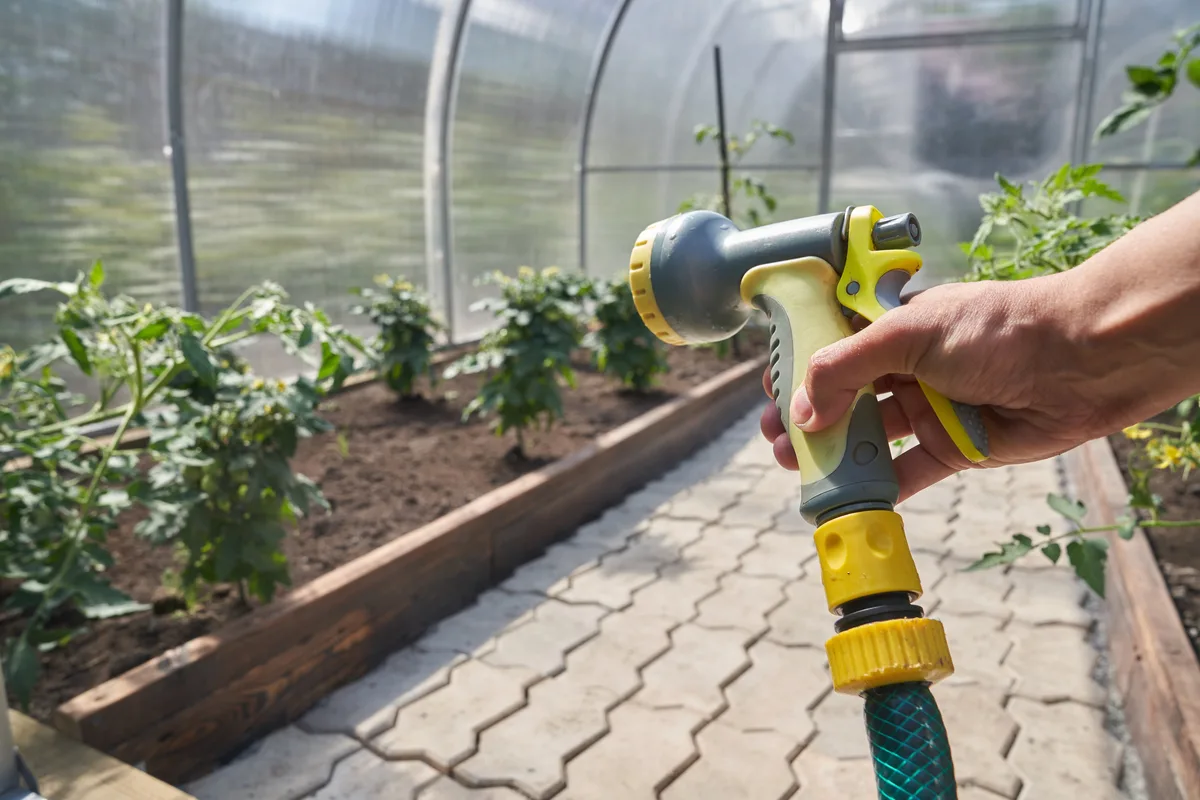
We all know that tomatoes are thirsty plants. To produce those juicy fruits, they need plenty of water throughout the season. Even a couple of days without water can greatly impact your harvest later on.
Depending on the rain in your region and the intensity of the sunlight, you will likely need to water your tomatoes every few days in spring, increasing in summer as temperatures rise. Keeping the soil moist in the early stages is vital to strong development later on.
How you water is just as important as when you water. Overhead watering will quickly lead to the proliferation of fungal and bacterial diseases, potentially killing your plants. You also need to water deeply, especially in early spring, to encourage the roots to travel downwards.

While using a hose and focusing on the soil is one way to get it right, drip irrigation is a far simpler and more reliable method of watering. It can be pricey, but the returns you will see in summer are well worth it.
Drip irrigation systems are best installed soon after planting in spring or just before. This allows you to perfectly place them close to your plants without impacting their growth.
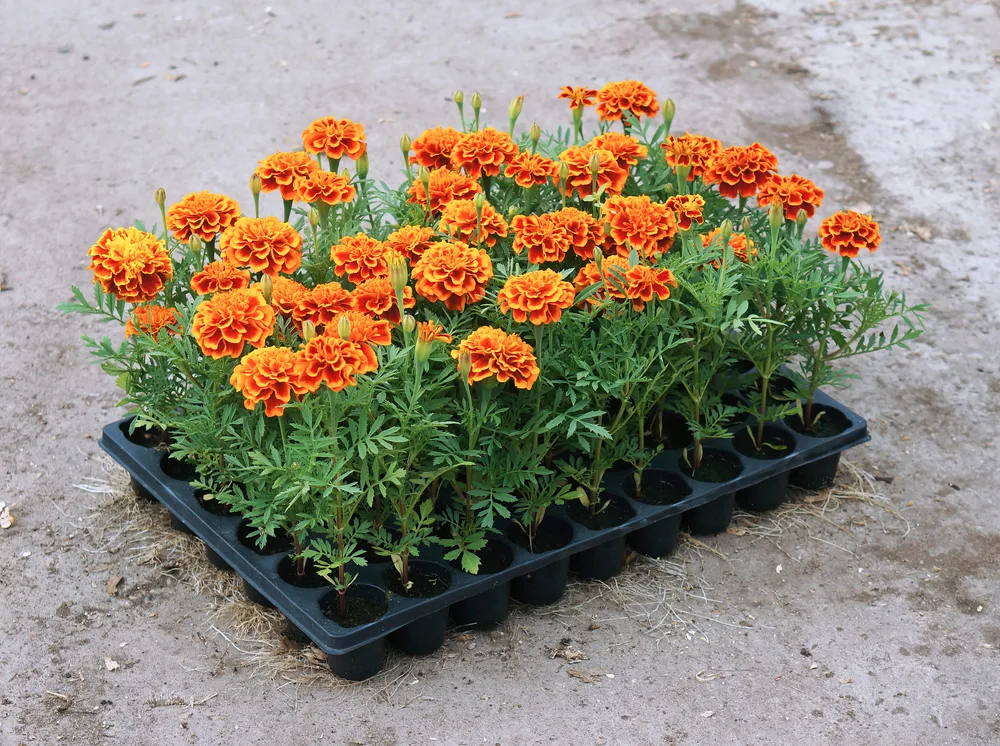
5. Plant Companions


If you haven’t yet considered your long-term season plan for your tomato patch, early spring is the perfect time to think about tomato companions. There are many tomato friends that provide several benefits in your tomato bed, from taste improvement to pest prevention and more.
Basil is one of the first plants you should reach for. Kept low to avoid shading the lower parts of the plant, basil is believed to deter some common bugs in tomato gardens – whiteflies, thrips, and mosquitos.
It is also said to improve the flavor of the tomatoes, imparting a sweet or basil-like flavor. Plus, they make wonderful companions in the kitchen too.


If basil isn’t on your to-plant list, there are plenty more options to choose from. Garlic is one, with a pungent smell that is said to keep aphids and spider mites away. Nasturtiums can be planted nearby as a trap crop, keeping a number of pests away from your fruit-producing plants. Marigolds are also a great option, both for their pest deterring ability and colorful flowers.
Related Reading: 5 Reasons To Surround Your Tomato Plants With Marigolds

6. Fertilize For Leaf Growth

While some gardeners choose to fertilize first at the time of transplanting, this does lead to a greater risk of fertilizer burn. Instead, fertilize in spring around a month after transplanting to strengthen stem and leaf growth and provide a healthy structure for even more fruits to grow on.
Higher levels of phosphorus are needed later on to improve fruiting. However, in spring, it’s best to focus on nitrogen. Start with a soil test to determine the nutrient levels. If the nutrients are optimal, a balanced 10-10-10 fertilizer applied directly to the soil is ideal. If nitrogen levels are lower, use a 10-5-5 instead.
Don’t forget to follow up with a flowering and fruiting-specific fertilizer right before fruiting as too much nitrogen will result in more leaf growth at the expense of fruit development.
7. Provide Supports
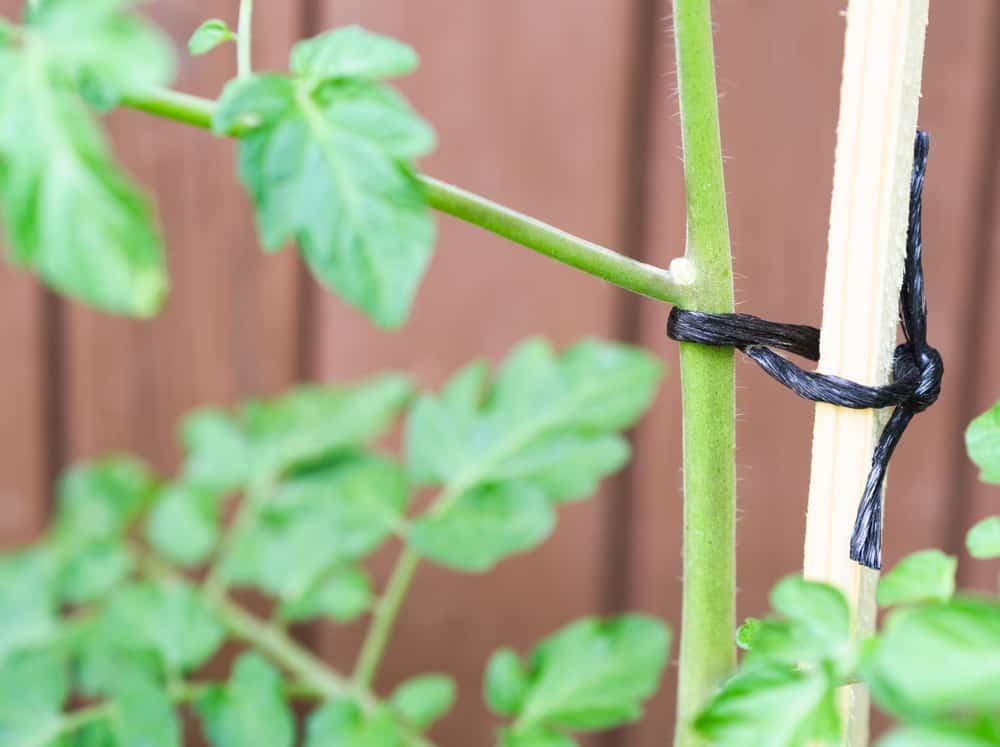

Most tomato varieties need support of some kind to keep the vines off the ground, preventing rotting and disease and the early demise of the plant before you can reap the benefits of harvest. Some short determinate plants can survive without support, but anything larger than 1 or 2 feet will grow best with some help.
Supports need to be installed in spring soon after planting. This stops the structure from disturbing the root system later on and impacting your potential harvest. Right after transplanting is best as you’ll know where the roots sit, but soon after is also suitable. It’s better to install supports later than not at all.
Again, you have a couple of options. A simple stake is great for smaller plants, dug in close to the main stem to tie to the stake as the plant grows. Tomato cages are also useful for smaller plants, while handmade trellis systems are easier to use for larger indeterminate varieties.
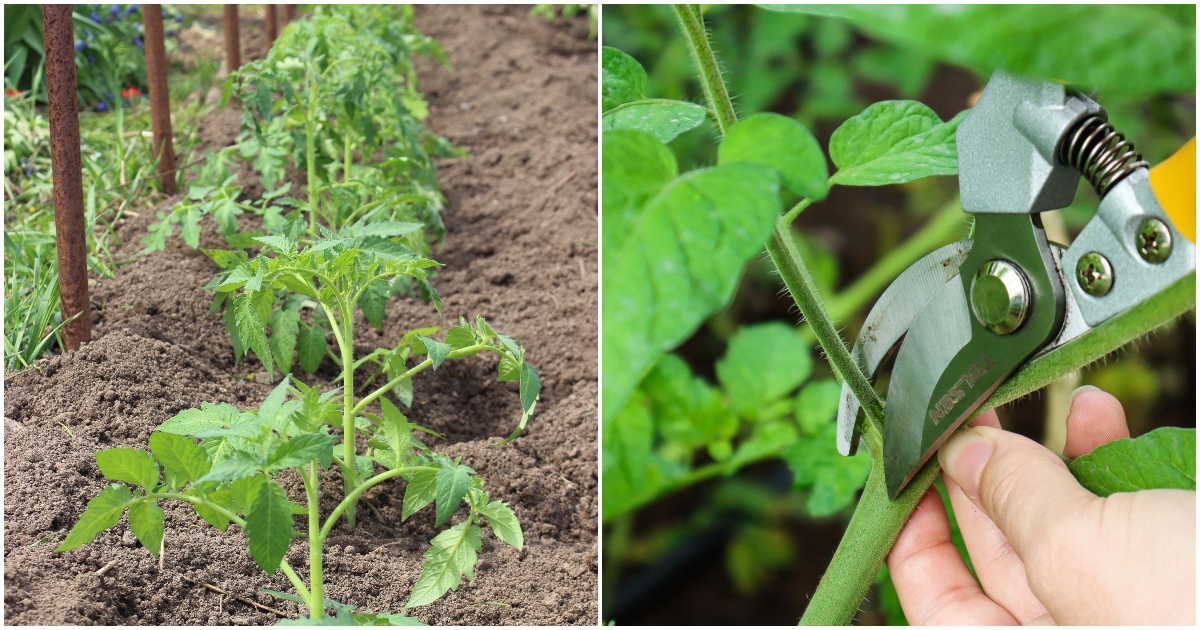
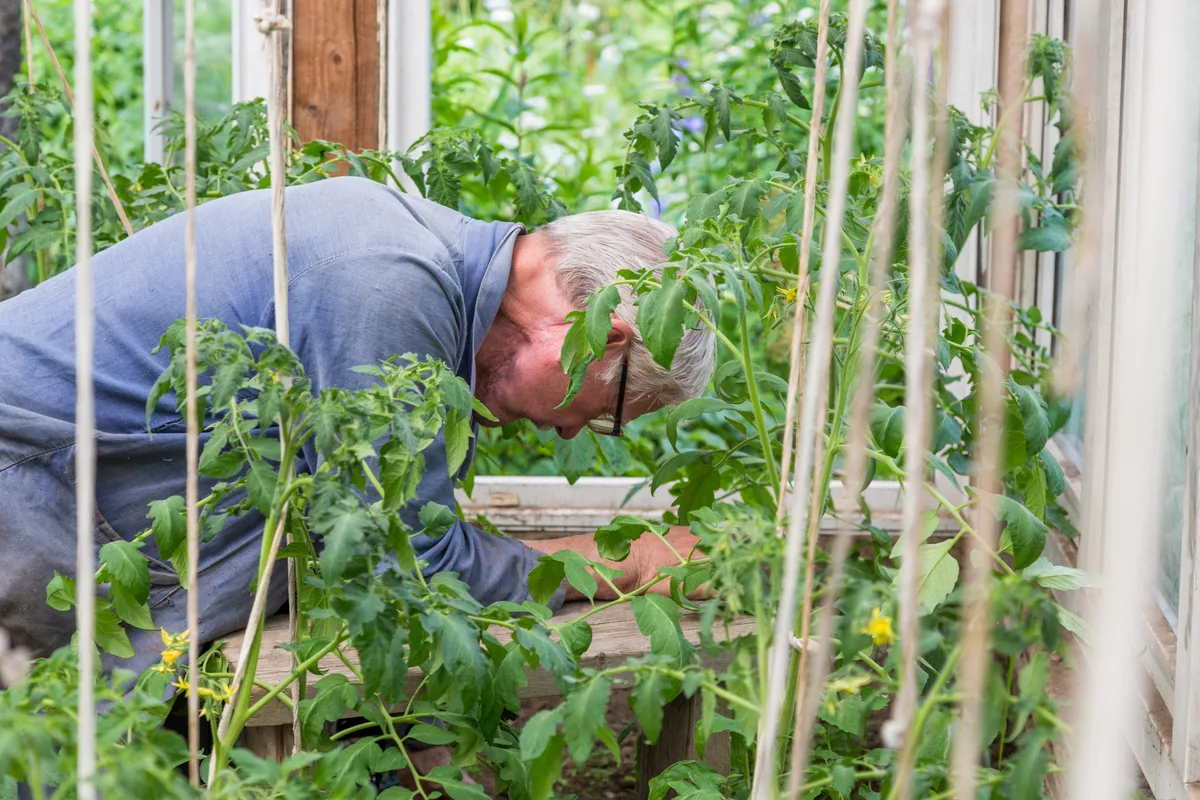
8. Prune Suckers

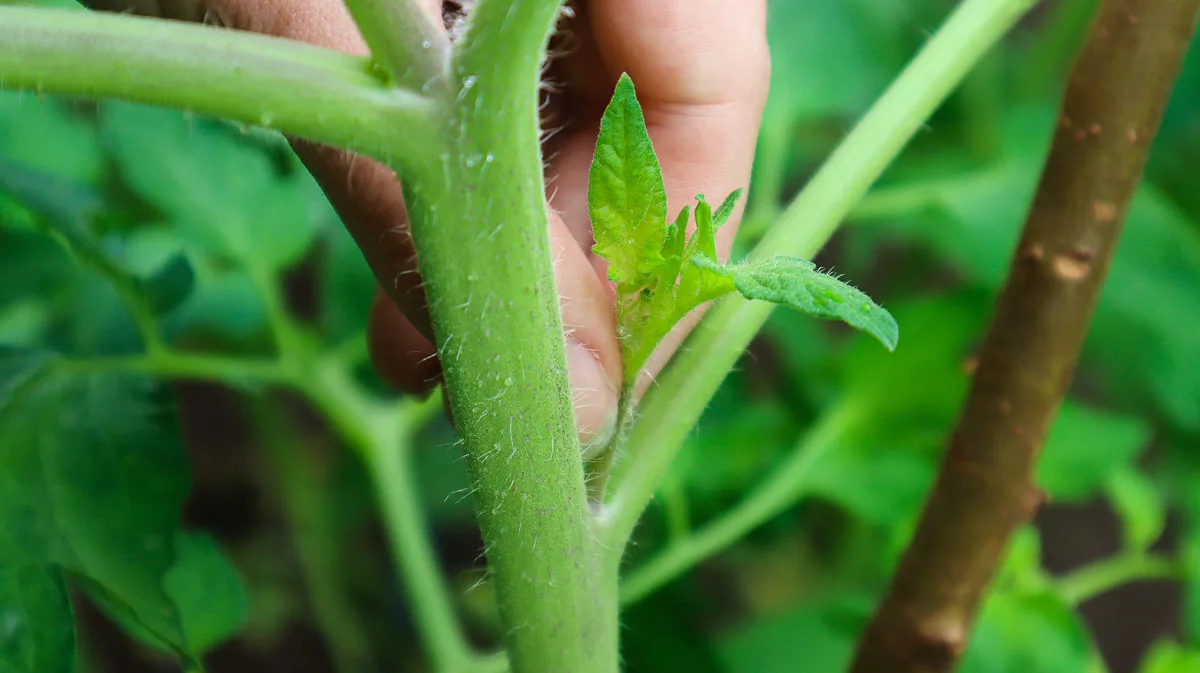
Pruning is usually considered an end-of-season task for many plants. That is not the case for tomatoes. Throughout mid and late spring, regular pruning helps shape the plant and develop stronger main stems, improving fruiting later.
Suckers are the shoots that appear between stems at a 45° angle. Left alone, they will eventually develop into full branches. But, this tends to overcrowd the plant and focus its energy on stem and leaf growth rather than on producing new fruits.
As suckers on the lower part of the plant develop, snap them off with your finger or trim them off with a sharp pair of pruning shears. While you’re busy, trim any damaged or diseased leaves and any vines touching the ground. This will keep the plant healthy, primed to produce the first fruits in summer.
Related Reading: 5 Times To Prune Tomato Plants For Huge Harvests
9. Propagate
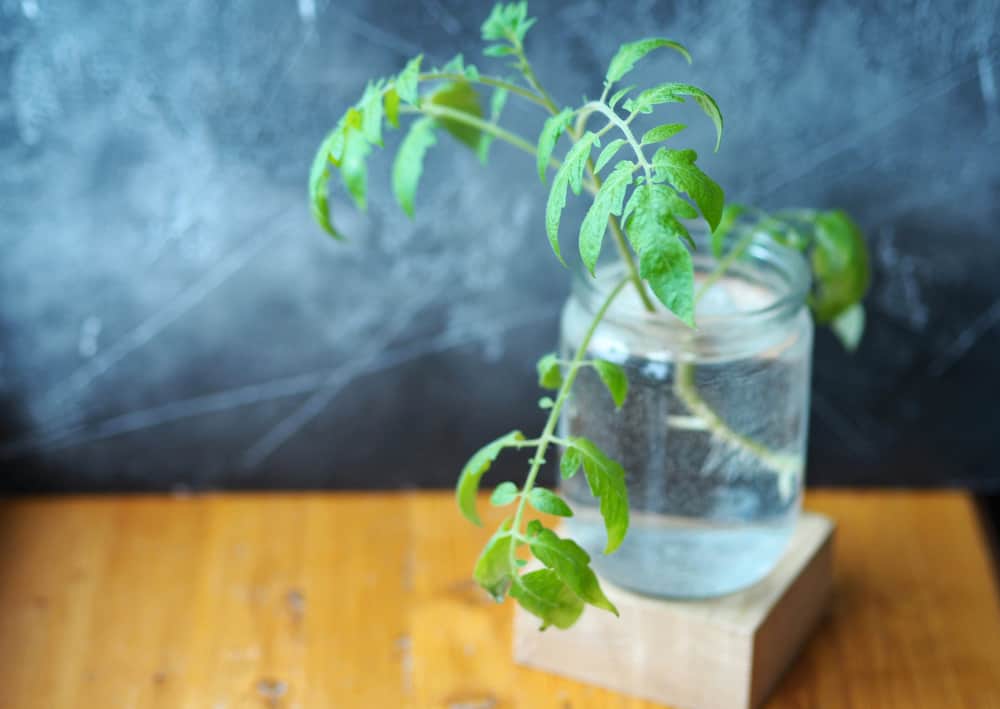

Luckily, pruning suckers doesn’t have to be a complete chore. You can use these cuttings to grow even more tomato plants, planted out later in the season to extend your harvest to late summer and beyond.
Simply pop any suckers that are around 4 inches long or larger into a glass of water, covering around two-thirds of the stem. Keep the water clean, replacing it every few days until roots develop along the stem. When the roots are around an inch or two long, you can plant these cuttings into pots or straight into the garden to continue growing.
This is by far the best way to increase your summer yield, by increasing your overall stock and therefore your overall harvest.
Here’s our total guide to propagating tomato plants from cuttings.
10. Mulch
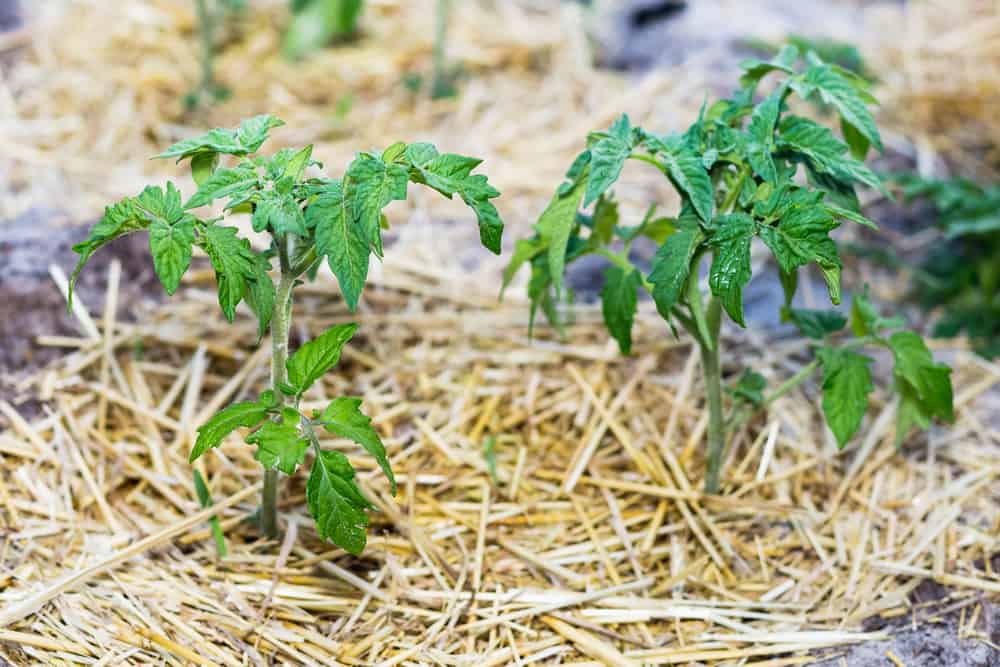
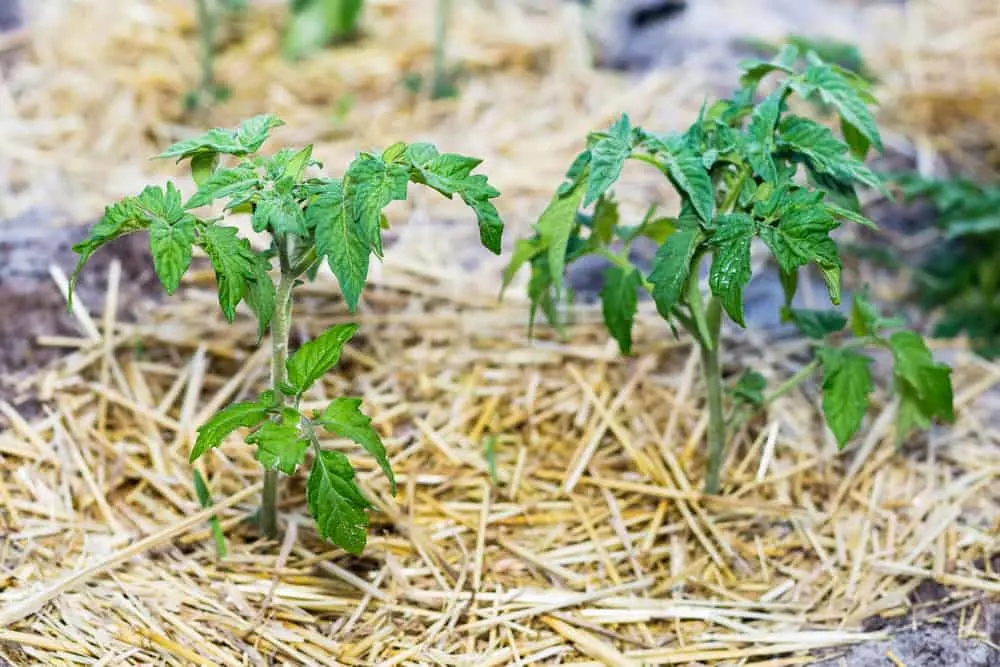
As tomatoes rely on plenty of water for growth and fruiting, keeping the soil consistently moist (but not waterlogged) is key to preserving your summer harvest. Watering directly impacts how many fruits your plant grows, how big those fruits grow, and how tasty they are once harvested.
One of the easiest ways to maintain moisture in the soil, without directly watering, is to mulch. Adding a thick layer of mulch around the base of your tomato plants as soon as temperatures begin to rise will slow evaporation, keeping your plants well-watered. It also keeps weeds down and makes any that do sneak through easier to pull.
Choose a mulch that will slowly break down over time to improve soil conditions. Take a look at our list of the best tomato mulches for a complete guide.